How to Turn Any Photo into a Cross Stitch Pattern
A step-by-step guide to converting any photo into a printable cross stitch pattern for free using Knytstudio.
Got a photo you love? A pet portrait, a holiday snap, a majestic alpaca who looks like it’s about to judge your life choices? You can turn it into a cross stitch pattern and actually stitch it. The whole process takes about five minutes, and you don’t need to pay for expensive software.
We’ll be using this alpaca as our example throughout the tutorial. We don’t know his name, but we’ve been calling him Gerald. Gerald did not consent to becoming a cross stitch pattern, but here we are.
Pick the Right Photo (This Part Matters More Than You Think)
Not every photo makes a good cross stitch pattern. Cross stitch works on a grid, where each stitch is a tiny square of color, so you’re essentially converting your photo into pixel art. That means some images translate beautifully, and others turn into an unrecognizable mess.
Photos that work well:
- High contrast images. Clear difference between light and dark areas. Think: a black cat on a white sofa, a sunset with bold oranges against a dark sky, or a rust-colored alpaca judging you from his barn.
- Simple subjects with clean backgrounds. A portrait against a plain wall, a single flower, a pet’s face filling most of the frame. Gerald here is a perfect example: one subject, simple background, maximum attitude.
- Close-up shots. The more your subject fills the photo, the more detail you’ll keep in the pattern.
Photos that don’t work well:
- Group photos where everyone is tiny
- Busy backgrounds with lots of competing detail
- Low-light or blurry shots
- Photos where the subject blends into the background
A quick trick: squint at your photo. If you can still tell what it is while squinting, it’ll probably make a decent pattern. If it all blurs together, pick a different image. Gerald is recognizable at any squint level because his disapproval transcends resolution.
Step 1: Upload Your Photo
Head to Knytstudio and click Upload a photo. You can also drag and drop an image straight onto the dashboard, or paste one from your clipboard with Ctrl+V.

Step 2: Crop
Once your image is loaded, you’ll see it in the crop view. Drag the corners or edges to select exactly the part of the photo you want to turn into a pattern.
This step matters more than you’d think. The tighter you crop around your subject, the more detail you’ll get in the final pattern without needing a massive stitch count. Gerald here has a perfectly good barn behind him, but nobody’s stitching this pattern for the barn. Crop it down to just the face and that glorious floof. You’ll thank yourself later.

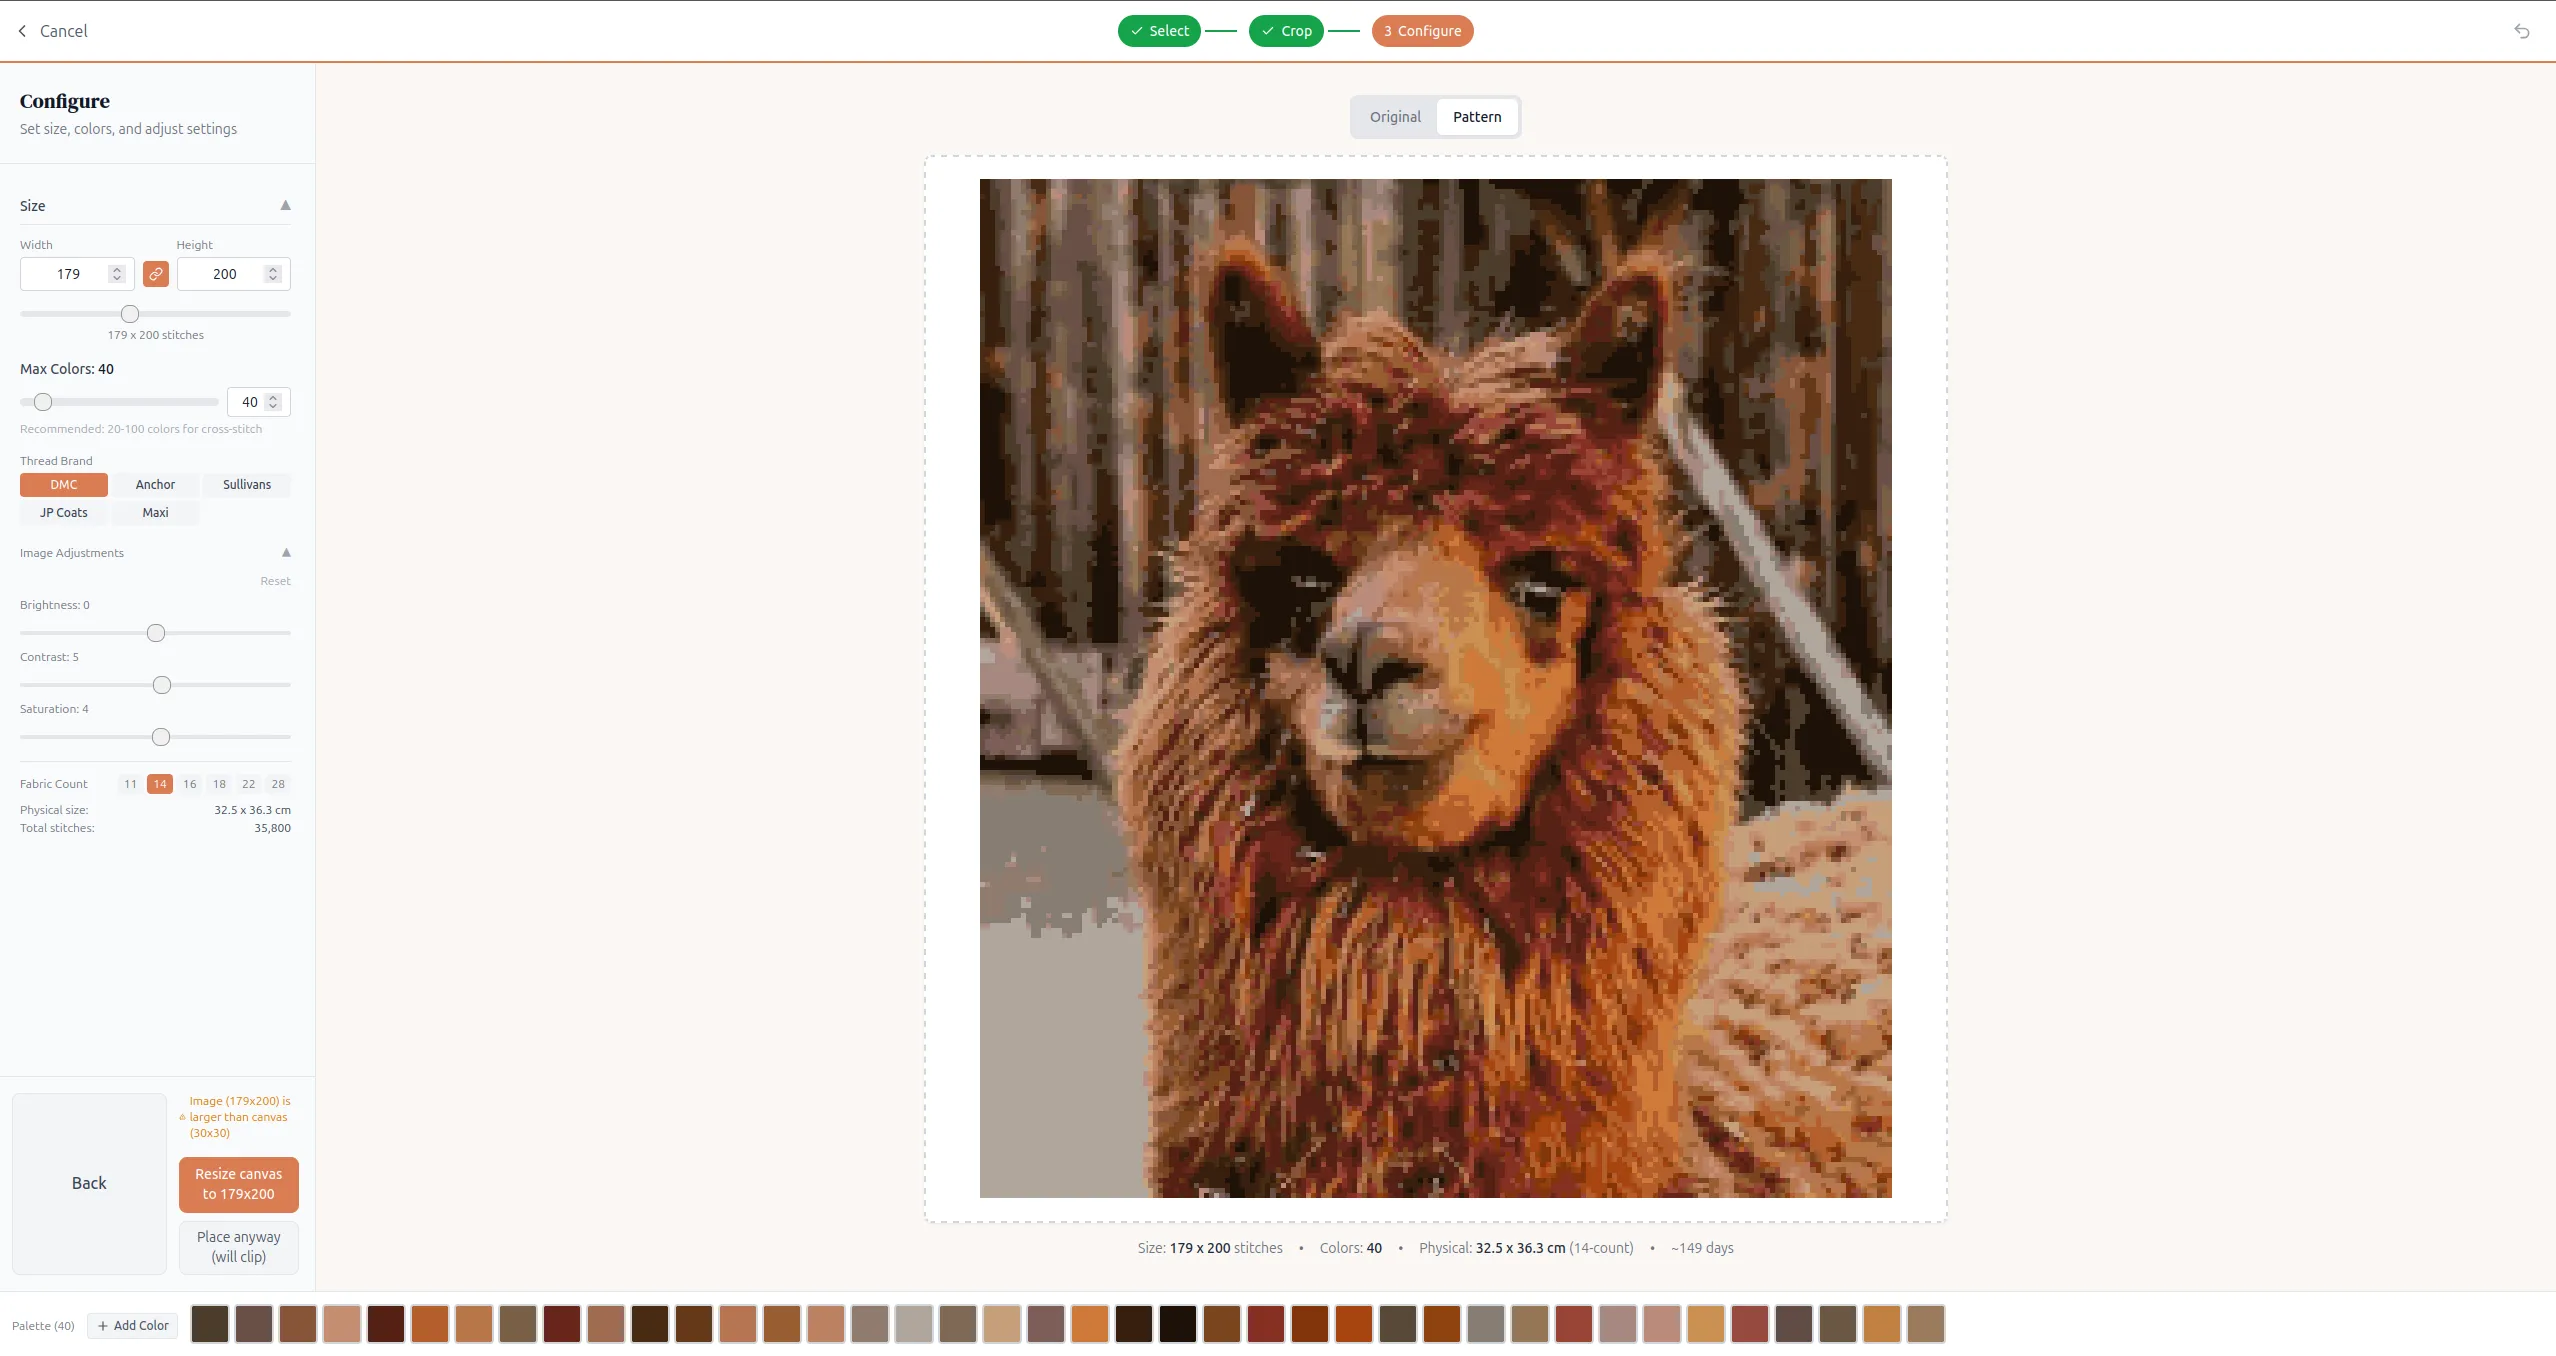
Step 3: Configure Your Pattern
This is where you dial in how your pattern will look. There are a few settings to play with:
Size (stitch count)
Set the width and height in stitches. This controls both how detailed your pattern looks and how big the finished piece will be. Knytstudio shows you the physical size and estimated stitching time right there on the screen, so you can see exactly what you’re committing to.
A rough guide:
| Stitch count | Detail level | Approximate size (14ct Aida) | Time estimate |
|---|---|---|---|
| 50 x 50 | Very simplified, icon-like | ~9 x 9 cm (3.5 x 3.5 in) | A few days |
| 100 x 100 | Good for simple subjects | ~18 x 18 cm (7 x 7 in) | A few weeks |
| 150 x 150 | Nice balance of detail and effort | ~27 x 27 cm (11 x 11 in) | 1-2 months |
| 200 x 200 | High detail, serious project | ~36 x 36 cm (14 x 14 in) | Several months |
These sizes assume 14-count Aida. For other fabric counts, see how to calculate cross stitch fabric size.
If this is your first photo pattern, start around 80-120 stitches on the longest side. You get enough detail to recognize the image without signing up for a year-long project. Gerald deserves your dedication, but maybe not that much dedication.
Max colors
More colors = more realistic, but also more thread to buy and more fiddly color changes while stitching. Fewer colors = more stylized and simpler to stitch.
Some starting points:
- 8-15 colors. Stylized, poster-like effect. Great for simple subjects.
- 20-30 colors. Good middle ground for most photos.
- 40+ colors. Photorealistic, but be prepared for lots of “confetti” (more on that in a second).
Thread brand
Pick the thread brand you want to work with. Knytstudio supports DMC, Anchor, Sullivans, JP Coats, and Maxi, so you’re not locked into one brand. The pattern will map your photo’s colors to real thread numbers from whichever brand you choose.
Image adjustments
Before the conversion happens, you can tweak the brightness, contrast, and saturation of your photo. This can make a big difference. Bumping up the contrast a little often gives you a cleaner, more readable pattern.
Fabric count
Choose your fabric count (11, 14, 16, 18, 22, or 28 count). This doesn’t change the pattern itself, but it updates the physical size calculation so you know exactly how big the finished piece will be on your chosen fabric. Not sure how much fabric to buy? Use the fabric size calculator to work it out.
You can toggle between Original and Pattern view to preview how the conversion looks before committing.
Step 4: Edit and Clean Up
Once you’re happy with the settings, the pattern opens in the editor. This is where most people stop too early, but spending a few minutes cleaning things up makes a huge difference in the final result.

Reduce confetti stitches. Confetti is the cross stitch term for scattered single stitches of random colors. One pink stitch surrounded by blue, one dark green pixel in the middle of an alpaca face. It happens because the software is trying to be accurate to the photo, but it makes the pattern miserable to actually stitch. Gerald’s wool is chaotic enough in real life without adding confetti to the mix.
Knytstudio has a built-in confetti removal tool that makes this easy. Click the sparkle icon in the toolbar and you’ll get options to set the isolation level (how “lonely” a stitch needs to be before it counts as confetti) and what to replace it with, usually the nearest neighboring color. You can fine-tune it with different brush sizes, or just hit Fix All to clean up the entire pattern in one click. It’s the fastest way to go from a noisy auto-generated pattern to something that’s actually pleasant to stitch.

Simplify areas that don’t need detail. Backgrounds, solid-colored clothing, and sky areas often come out looking noisy. Use the palette to pick a background color and paint over the messy bits. The subject of your photo is what matters.
Check the edges. The outline of your subject is where the pattern lives or dies. Zoom in and make sure the silhouette reads clearly. A few small edits here make a huge difference.
The editor gives you a full set of drawing tools (pencil, fill, shapes, lines, text) plus a palette panel on the right where you can add, remove, or swap colors. Take your time here. This is the step that separates a “generated” pattern from a pattern that’s actually fun to stitch.
Choose Your Fabric and Thread
Your pattern is done. Now you need the physical supplies.
Fabric: Most cross stitchers use Aida cloth. You already picked your fabric count during setup, so you know your finished size. As a reminder:
- 14 count. The most popular. Easy to see and work with, good for beginners.
- 16 count. Slightly smaller stitches, slightly more detailed result.
- 18 count. Smaller still. Great for detail, harder on the eyes.
Higher count = smaller finished piece for the same stitch count.
Thread: Your pattern will list the exact color numbers you need for whichever brand you picked during setup (DMC, Anchor, Sullivans, JP Coats, or Maxi). Most craft stores stock DMC since it’s the most widely available. A skein typically costs around $0.50-$1.00 and one is usually more than enough for a single pattern.
Export and Start Stitching
When you’re happy with your pattern, export it as a PDF. Your export includes:
- The full color chart
- A symbol chart (for when colors look too similar on paper)
- A thread list with color numbers for your chosen brand
- The total stitch count
Print it out, buy your thread and fabric, and you’re ready to go. Most people find it easiest to start from the center of the pattern and work outward.
You can also publish your pattern to the Knytstudio community if you want to share it, or keep it private if it’s just for you.
Tips for Better Results
A few things I’ve learned that’ll save you frustration:
Crop tight before uploading. The more of the frame your subject fills, the more detail you’ll get. Don’t upload a full landscape and hope the person in the corner will be recognizable.
Start small for your first project. An 80 x 80 pattern with 15 colors is achievable in a few weeks. A 200 x 200 pattern with 50 colors is a six-month commitment. Get a win under your belt first.
Consider adding backstitch. Backstitch is a simple outline stitch that goes around or over your cross stitches. It can dramatically sharpen features, especially eyes, outlines, and text. If your pattern looks a bit blobby, adding a backstitch outline might be all it needs. Knytstudio has a built-in backstitch tool in the editor: draw precise segments line by line, or use the freehand pen mode to trace an outline in one stroke. The backstitch lines come along in your PDF, image, and OXS exports.
Don’t aim for photorealism. The charm of a cross stitch photo pattern is that it looks like cross stitch. A slightly stylized version of your photo, with 20 colors and visible texture, often looks better on the wall than a hyper-detailed 60-color version that tries to be a photograph. Gerald looks better as a slightly blocky, impressionist alpaca anyway. It adds to his mystique.
Step back from your work. Cross stitch patterns are designed to be viewed from a distance. If it looks like a jumble of squares up close but reads beautifully from across the room, you’re doing it right.
Ready to Try It?
Head over to Knytstudio and upload a photo. It’s free, no signup required, and you’ll have a printable PDF pattern in minutes. Alpaca not required, but encouraged.
If you make something you’re proud of, we’d love to see it. Share it with the community and tag us! Gerald will be watching. Gerald is always watching.
New to cross stitch terminology? Check out the cross stitch glossary for definitions of terms like confetti, Aida, and backstitch. Wondering how long your project will take? See our realistic time estimates. Have other questions? Visit the FAQ.