
Free Amigurumi Bear Pattern (Beginner Friendly, Single Crochet Only)
A free amigurumi bear pattern in US terms: body, head, snout, ears, arms and legs in single crochet, with stitch counts and assembly notes.
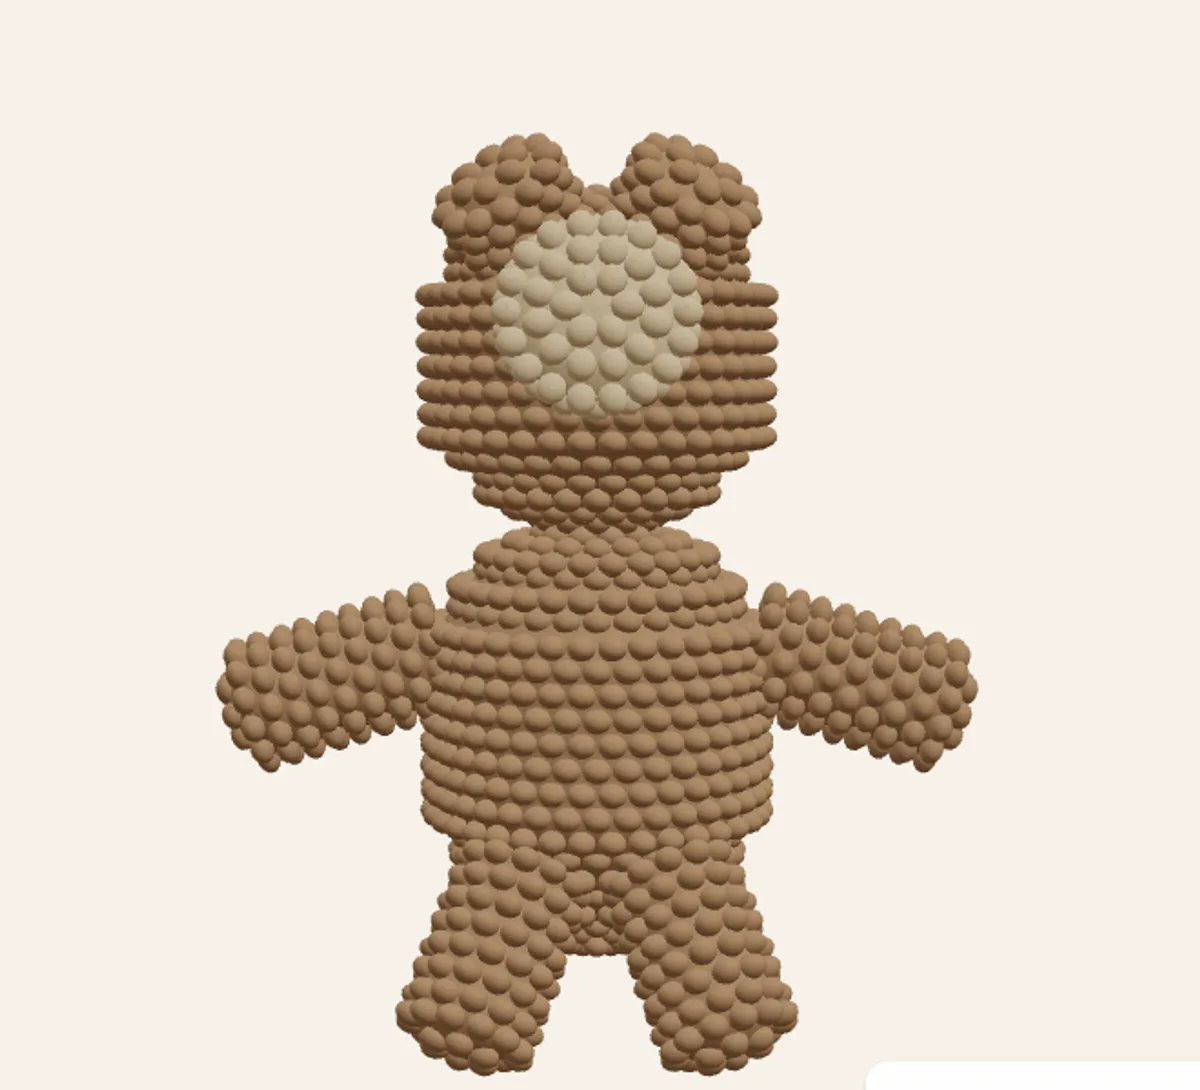
A small, round bear with a snout and stubby arms and legs: the classic first amigurumi. This pattern uses nothing but single crochet, increases and decreases, so if you can crochet a magic ring you can make him. He comes out about 15 cm tall in medium (DK) yarn.
This pattern was written by our amigurumi designer: you put the animal together from parts in 3D, and it writes the rounds. That means every count below is exact for these proportions, and if you want a bigger head or shorter legs, you can open the bear in the designer, change it, and get a fresh pattern.
Materials
- Medium (DK or light worsted) yarn in the main colour, about 60 g, plus a little cream for the snout
- 3.5 mm crochet hook
- Fibrefill stuffing
- A yarn needle, a stitch marker, and safety eyes (8 mm) or black yarn to embroider the eyes
Abbreviations (US terms)
- sc single crochet
- inc 2 sc in the same stitch
- dec invisible decrease (insert the hook through the front loops of the next two stitches, yarn over and pull through both, yarn over and pull through two)
- st stitch
- Rnd round. Work in a continuous spiral; do not join. Mark the first stitch of each round.
The pattern
Body
- Rnd 1: 6 sc in a magic ring (6)
- Rnd 2: inc in each st (12)
- Rnd 3: (sc, inc) x6 (18)
- Rnd 4: (2 sc, inc) x6 (24)
- Rnd 5: sc in each st (24)
- Rnd 6: (3 sc, inc) x6 (30)
- Rnd 7: sc in each st (30)
- Rnd 8: (4 sc, inc) x6 (36)
- Rnd 9-16: sc in each st (36)
Stuff firmly as you go from here.
- Rnd 17: (4 sc, dec) x6 (30)
- Rnd 18: sc in each st (30)
- Rnd 19: (3 sc, dec) x6 (24)
- Rnd 20: sc in each st (24)
- Rnd 21: (2 sc, dec) x6 (18)
- Rnd 22: (sc, dec) x6 (12)
- Rnd 23: sc in each st (12)
- Rnd 24: dec x6 (6)
Fasten off. Stuff firmly, close the hole with the yarn needle and weave in the end.
Head
- Rnd 1: 6 sc in a magic ring (6)
- Rnd 2: inc in each st (12)
- Rnd 3: (sc, inc) x6 (18)
- Rnd 4: (2 sc, inc) x6 (24)
- Rnd 5: sc in each st (24)
- Rnd 6: (3 sc, inc) x6 (30)
- Rnd 7: sc in each st (30)
- Rnd 8: (4 sc, inc) x6 (36)
- Rnd 9-14: sc in each st (36)
Stuff firmly as you go from here.
- Rnd 15: (4 sc, dec) x6 (30)
- Rnd 16: (3 sc, dec) x6 (24)
- Rnd 17: sc in each st (24)
- Rnd 18: (2 sc, dec) x6 (18)
- Rnd 19: (sc, dec) x6 (12)
- Rnd 20: dec x6 (6)
Fasten off. Stuff firmly, close the hole with the yarn needle and weave in the end.
Snout
- Rnd 1: 6 sc in a magic ring (6)
- Rnd 2: inc in each st (12)
- Rnd 3: (sc, inc) x6 (18)
- Rnd 4: sc in each st (18)
Fasten off, leaving a long tail for sewing. Stuff lightly.
Ear (make 2)
- Rnd 1: 6 sc in a magic ring (6)
- Rnd 2: inc in each st (12)
- Rnd 3-4: sc in each st (12)
Fasten off, leaving a long tail for sewing. Stuff lightly.
Arm (make 2)
- Rnd 1: 6 sc in a magic ring (6)
- Rnd 2: inc in each st (12)
- Rnd 3-10: sc in each st (12)
Fasten off, leaving a long tail for sewing. Stuff lightly.
Leg (make 2)
- Rnd 1: 6 sc in a magic ring (6)
- Rnd 2: inc in each st (12)
- Rnd 3-9: sc in each st (12)
Fasten off, leaving a long tail for sewing. Stuff lightly.
Assembly
- Sew the head to the top of the body.
- Sew the snout to the head at round 9.
- Sew the ears to the head at round 4, 6 stitches apart.
- Sew the arms to the body at round 9, on opposite sides.
- Sew the legs to the body at round 18, 5 stitches apart.
About 1704 stitches in total.
Tips
- Stuff the head and body firmly and the limbs lightly. Firm stuffing is what makes the rounds sit smoothly.
- Sew the snout on before the eyes, so you can place the eyes just above it and get the expression you want.
- Pin the arms and legs in place before sewing and turn him around once. Ten seconds of pinning saves twenty minutes of re-sewing.
Make it your own
The proportions above are one version of a bear. In the designer you can make the head larger, the ears longer, the legs stubbier or the whole animal twice the size, and it writes the new rounds for you, with the stitch counts and assembly notes updated. Your first pattern is free.
Frequently asked questions
What yarn and hook do I need for this amigurumi bear?
Any medium (DK or light worsted) yarn with a 3.5 mm hook. Go a hook size smaller than the yarn label says so the stuffing does not show through. Thin yarn with a 2.5 mm hook makes a smaller bear; chunky yarn with a 5 mm hook a bigger one.
Is this pattern in US or UK terms?
US terms. sc is single crochet (UK double crochet), inc is two sc in the same stitch, dec is an invisible decrease. Work in a continuous spiral without joining and mark the first stitch of each round.
Can I change the size or the shape?
Yes. This pattern was written by the KnytStudio amigurumi designer from a 3D model. Open the bear there, drag the sliders to make the head bigger or the legs longer, and the round-by-round instructions rewrite themselves.